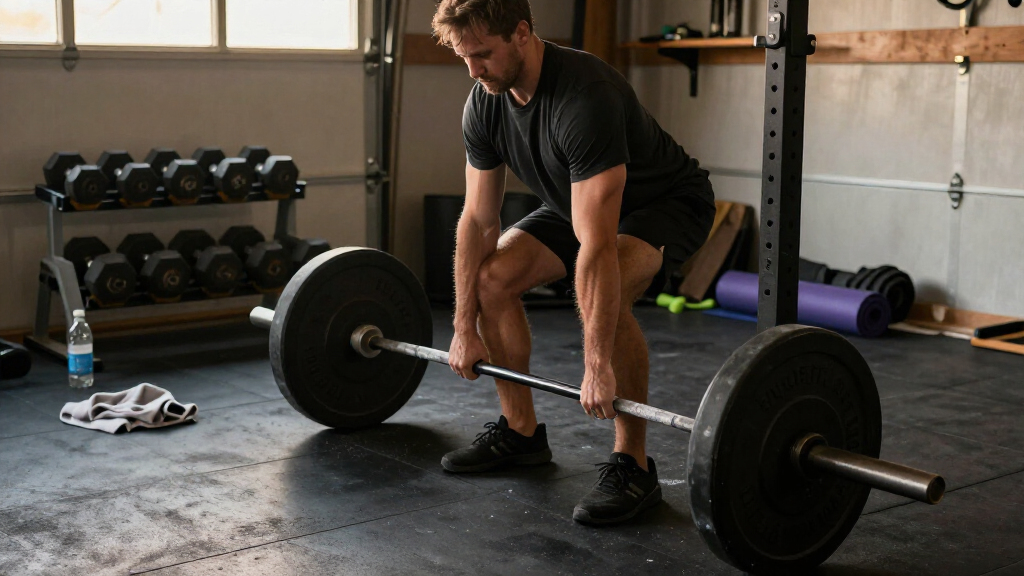

This guide walks you through building a complete home gym equipment set from scratch: deciding what you need, measuring your space, setting a budget, buying the right equipment, and setting it up so you can train safely from day one. By the end, you will have a functional gym that supports strength training, conditioning, or general fitness without wasted purchases.

Get workout gear delivered free — and shop member deals
- Fast, free delivery on millions of items
- Access to Prime Big Deal Days deals on October 6–7
- Prime Video, Amazon Music and more included

CAP Rubber Coated Dumbbell Weight Set with Vertical Rack
- ✔ Brand: CAP
- ✔ Set Weight: 150 lb
- ✔ Available Options: 100 lb, 150 lb, 210 lb

Amazon Basics Neoprene Dumbbell Hand Weight Set with Stand
- ✔ Brand: Amazon Basics
- ✔ Weights Included: 2 each of 3 lb, 5 lb, and 8 lb (6 total)
- ✔ Coating: Neoprene

Ayombo Pilates Bar Kit with Resistance Bands
- ✔ Brand: Ayombo
- ✔ Resistance Bands: Two pairs: 30 lb and 40 lb (up to 70 lb combined)
- ✔ Bar Sections: Adjustable 2 or 3 sections
This guide is written for beginners with little or no home gym experience. You do not need prior equipment knowledge. Budget-conscious readers should plan for a basic set between $200 and $600; a more durable mid-range set runs $800 to $2,000. Expect to spend a few hours planning and shopping, and half a day unpacking and assembling.
Difficulty: Beginner | Time: 2-4 hours of planning and shopping, plus half a day for setup
What You’ll Need
Tools & Materials:
- Tape measure
- Notebook or spreadsheet for planning
- Smartphone for price comparison
- Basic hand tools for assembly (usually included with equipment): Allen keys, adjustable wrench, socket set
- Floor protection: rubber mats or interlocking foam tiles
Knowledge:
- Basic awareness of your fitness goals (strength, cardio, general health, or sport-specific)
- Ability to measure a room accurately
Check your floor’s load tolerance if you live in an apartment above someone else — a loaded barbell plus rack can exceed 300 lbs concentrated in a small footprint. Confirm any building rules about heavy equipment before purchasing. If you plan to bolt a rack to the floor, verify you own the space or have permission.
CAP Rubber Coated Dumbbell Weight Set with Vertical Rack
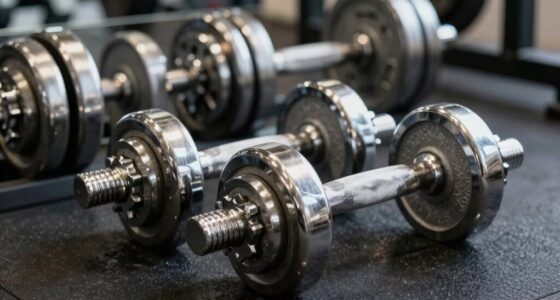
This is the most complete training package of the three, and it earns our top spot because it’s the only set here that scales with you for years. With pairs from 5 to 25 lb, it covers everything from lateral raises and presses to goblet squats and rows — the full range of a beginner-to-intermediate strength program. Compared with the Amazon Basics set, the CAP set’s 25 lb top weight more than triples the ceiling, and unlike the Ayombo Pilates bar, dumbbells build stability and coordination that resistance bands can’t fully replicate.The details are where this set pulls ahead. The rubber hex coating protects floors and dampens the clank of dropped weights, while the hex shape itself prevents the classic hazard of a round dumbbell rolling underfoot mid-set. The A-frame vertical rack is the real organizational win: it keeps five pairs organized in roughly the footprint of a small chair, where a flat rack would eat an entire wall. Knurled steel handles give a secure grip even with sweaty hands — something the smooth neoprene grips on the Amazon Basics weights don’t need to solve but that matters at heavier loads.The honest drawback is the weight ceiling. Strong lifters will find 25 lb dumbbells too light for pressing and pulling movements fairly quickly, and CAP does offer 100 lb and 210 lb configurations that heavier-trained buyers should consider instead. There’s also a floor-space commitment here that the Ayombo kit avoids entirely — this is equipment that lives in a room, not in a closet.
Pros:
- Five weight pairs covering a genuine progression path from beginner to intermediate strength work
- Rubber hex coating protects floors, cuts noise, and prevents dumbbells from rolling
- Compact A-frame vertical rack keeps the entire set organized in a small footprint
- Knurled steel handles stay secure in sweaty hands at heavier loads
Cons:
- 25 lb maximum per dumbbell will be limiting for advanced pressing and rowing
- Requires dedicated floor space for the rack, unlike portable alternatives
Best for: Beginner to intermediate lifters who want a complete, organized free-weight setup for progressive strength training at home
Not ideal for: Advanced lifters who press or row beyond 25 lb per dumbbell, or anyone with no dedicated floor space for a rack
Bottom line: The most future-proof set of the three — a real home gym foundation rather than a starter stopgap.
“The most future-proof set of the three — a real home gym foundation rather than a starter stopgap.”
Amazon Basics Neoprene Dumbbell Hand Weight Set with Stand
Where the CAP set is a long-term strength investment, this set is about low-cost, low-friction entry. Six dumbbells — two each of 3, 5, and 8 lb — plus a storage stand give a complete toning and light-training setup without the commitment of a rack-mounted weight collection. For someone starting a home routine, walking workouts, or physical therapy-style exercises, these three increments are genuinely all you need at first.The neoprene coating is the standout feature here, and it serves a different purpose than the rubber on the CAP dumbbells. Rather than protecting floors from heavy drops, it provides a soft, nonslip, sweat-friendly grip that makes high-rep dumbbell work comfortable without gloves. The color-coded ends with printed weights are a small touch that speeds up circuit training — you grab the right pair without checking. Hexagonal ends do the same anti-roll job as on the CAP set, which matters more than you’d expect between exercises on a wood floor.The tradeoffs are obvious next to our top pick. An 8 lb ceiling means presses, rows, and squats become resistance-limited within weeks for most men and within a few months for many women — this is a toning set, not a strength-building one. The included stand also requires assembly and is lighter-duty than CAP’s A-frame. Compared with the Ayombo Pilates bar, this set offers fixed free-weight feel but none of the portability; the Ayombo kit wins for travel, while this wins for simple grab-and-go dumbbell work at home.
Pros:
- Three weight pairs provide varied intensity for circuit and toning routines
- Nonslip neoprene coating keeps grips comfortable through high-rep, sweaty sessions
- Color-coded, printed weights make quick identification easy mid-workout
- Includes a storage stand at a beginner-friendly entry point
Cons:
- 8 lb maximum weight is limiting for virtually any strength progression
- Storage stand requires assembly and is lighter-duty than the CAP rack
- No upgrade path within the set itself
Best for: Beginners, walkers, and anyone focused on toning, high-rep training, or light home workouts on a budget
Not ideal for: Anyone with strength goals beyond light toning — the 8 lb maximum becomes a hard ceiling quickly
Bottom line: A sensible, comfortable starter set — as long as you go in knowing it’s a first step, not a destination.
“A sensible, comfortable starter set — as long as you go in knowing it’s a first step, not a destination.”
Ayombo Pilates Bar Kit with Resistance Bands
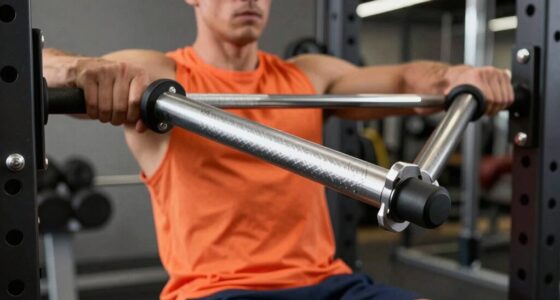
This kit solves a problem free weights fundamentally can’t: it delivers a full-body workout that disassembles into a carry bag. The three-section bar breaks down, the bands coil flat, and the whole kit stores in a closet or suitcase — making it the only option here that works equally well in a studio apartment, a dorm, or a hotel room. For Pilates-style training targeting legs, hips, waist, and arms, it’s a genuinely capable tool, not a gimmick.The resistance system is more flexible than it first appears. Two pairs of bands — 30 lb and 40 lb — can be used separately or combined for up to 70 lb of resistance, which covers a wide band of Pilates and sculpting movements. The 360° rotating metal lugs are the detail that separates a good bar kit from a frustrating one: bands that twist and tangle mid-exercise ruin workouts, and this design eliminates that failure point. Foam padding on the bar keeps long sessions comfortable where a bare steel bar would bite into shoulders during squat presses.The honest limitations: 70 lb of combined resistance is substantial for Pilates but modest compared with the CAP set’s 150 lb of real iron, and band resistance never feels quite like free weights for building maximal strength. No specific warranty terms are published either, which is worth noting for a product with elastic components that wear over time. Compared with both dumbbell sets, this is also the least durable category — bands degrade, steel dumbbells essentially don’t. But if the alternative to this kit is no home gym at all because of space, that tradeoff is easy to accept.
Pros:
- Up to 70 lb of combined resistance from two pairs of swappable bands
- Detachable design packs into an included carry bag for storage and travel
- 360° rotating lugs prevent band tangling during movement
- Comfortable non-slip foam grip with secure screw-in assembly
Cons:
- Resistance bands can’t replicate the feel or progression ceiling of free weights
- No specific warranty terms published, and elastic components wear over time
Best for: Apartment dwellers, frequent travelers, and Pilates or low-impact strength enthusiasts who need equipment that disappears when not in use
Not ideal for: Lifters focused on maximal strength or heavy progressive overload, or anyone who wants equipment that lasts decades
Bottom line: The best choice where space is the deciding factor — a legitimate full-body gym that fits in a bag.
“The best choice where space is the deciding factor — a legitimate full-body gym that fits in a bag.”
As an Amazon Associate we earn from qualifying purchases.
Before You Start
Decide your primary training goal before you spend money. A set built for strength training (barbell, plates, rack) is nearly useless for someone who mainly wants cardio, and vice versa. The three common goals are: (1) strength and muscle building, (2) general fitness and fat loss, and (3) conditioning and endurance. Most people are best served by a hybrid set, which this guide builds.
Set a hard budget ceiling now, including 10-15% for shipping, mats, and small accessories. Equipment marketing is aggressive, and pre-set spending limits prevent impulse upgrades you will regret.
Step-by-Step Instructions
Step 1: Measure your available space
Measure the length, width, and ceiling height of the area where the gym will live using a tape measure, and write down all three numbers. For a power rack, you need a footprint of at least 4 ft x 4 ft for the rack itself, 8 ft of width for a barbell to move freely during exercises like bench press, and ceiling height of at least 7 ft (8 ft is safer for overhead pressing). For a dumbbell-only setup, a 6 ft x 6 ft clear area is enough.
Tip: Measure ceiling height at the lowest point in the area, including under any ducts, beams, or sloped ceilings. Also note door widths and hallway turns — many people buy a rack that cannot fit through their door.
Check: You have written dimensions for floor space, ceiling height, and door/hallway clearance.
Step 2: Define your equipment list based on training goals
Select the tier that matches your budget and goals, then write out a specific shopping list for it:
- Starter set ($200-400): adjustable dumbbells or a fixed dumbbell pair, a yoga mat, resistance bands, and a pull-up bar that mounts in a doorway.
- Mid-range set ($600-1,200): an Olympic barbell (men’s 20 kg / women’s 15 kg), weight plates totaling 150-300 lbs, an adjustable weight bench, and a basic squat rack or half rack.
- Complete set ($1,500-2,500): the mid-range items plus a full power rack with safety bars, a pull-up bar, a second pair of dumbbells or adjustable dumbbells, and optionally a rowing machine or stationary bike for conditioning.
Add interlocking rubber floor mats to every tier — they protect your floor and dampen noise.
Tip: Buy the barbell, plates, bench, and rack first. Accessories like straps, belts, and specialized attachments can wait until you know you need them.
Check: You have a written list of specific items with target prices for each.
Step 3: Set your total budget with a contingency
Add up the target prices on your list, then add 15% for shipping, mats, and small extras. If the total exceeds your ceiling, cut items from the bottom of your priority list — never cut the bench, rack quality, or floor protection. Write the final number down and treat it as a hard limit.
Check: You have a single total budget number that fits within what you can spend.
Step 4: Compare products and check weight ratings
Compare at least two or three products for each item on your list, online or in store, and verify these specifics: bench — rated for at least 600 lbs total (your body weight plus the weight you lift); rack — rated well above the heaviest weight you will ever rack, with safety bars included; barbell — a standard Olympic bar with a 28-29 mm shaft and sleeve bearings or bushings, rated at 1,000 lbs or more; plates — confirm the hole diameter matches your bar (2-inch Olympic sleeves for standard Olympic bars).
Tip: Cheap benches with 250-300 lb ratings fail and fold under load. This is the single most common safety-related purchase error in home gyms.
Check: Each item on your list has a specific model, price, and verified weight rating.
Step 5: Purchase from retailers with workable return policies
Buy your equipment from retailers that allow returns of large items within at least 30 days. Order floor mats at the same time so they arrive before or with the heavy equipment. Schedule delivery for a day when you have 2-3 hours free to receive and inspect boxes.
Tip: Check whether delivery is curbside or to your door. Curbside delivery means you must move heavy boxes yourself — arrange a second person or a hand truck in advance.
Check: Orders placed, delivery dates known, and help or equipment arranged for moving heavy items.
Step 6: Inspect everything on arrival
Open each box and inspect it for damage before signing or discarding packaging: check for cracked welds, bent barbell sleeves, torn upholstery, and missing bolts. Compare the parts list in the assembly manual against what is in the boxes. Photograph any damage immediately and contact the retailer the same day — return windows for damaged goods are often short.
Check: All items are undamaged, complete, and any problems are documented and reported.
Step 7: Lay floor protection and position heavy items first
Lay your rubber mats or foam tiles across the training area before placing any equipment. Position the rack (if you bought one) first, in the spot you measured, leaving at least 3 ft of clear space on each side. Place the bench inside or beside the rack, and store plates on a plate tree or the rack’s built-in pegs — never loose on the floor where they can be tripped over or roll.
Tip: Leave at least 2 ft of clearance behind the bench press position so a spotter or escape path exists when training alone.
Check: Mats are down, the rack is level and stable, and every item has a fixed location with clearance around it.
Step 8: Assemble and torque all hardware
Assemble the rack, bench, and any other equipment following the included manual exactly. Tighten every bolt, then go back a second time and re-tighten all of them — bolts settle after initial assembly and loosen under load. If the manual specifies torque values, use a torque wrench; if not, tighten firmly by hand without stripping the threads.
Tip: Assemble the rack where it will be used. A fully assembled power rack often cannot be moved through doorways.
Check: All hardware is installed and double-tightened; nothing wobbles when you push the rack and bench firmly from multiple directions.
Step 9: Test with light loads before full use
Perform a safety test before your first real workout. Set the rack’s safety bars at the correct height for your squat (just below your lowest bar position) and bench press (just above chest level when lying flat). Load the bar with only the bar or light weight, and perform one slow repetition of each main lift — squat, bench press, and overhead press if your ceiling allows. Check that the bench does not shift and the rack does not rock.
Check: Every lift can be performed through a full range of motion without the equipment moving, and safety bars catch the bar when you lower it onto them in a controlled test.
Step 10: Organize the room for daily use
Assign a fixed home to every item: place plates on the tree or pegs sorted by weight, arrange dumbbells on a rack or mat in pairs, hang bands on a hook, and store collars and small tools in a bin by the rack. Keep a 3 ft walkway clear around the training zone. Fold or rack anything not in use after every session.
Check: You can walk from the door to the rack without stepping over anything, and every piece of equipment has a designated spot.
Common Mistakes to Avoid
- Buying equipment before measuring the space, then discovering the rack or bench does not fit. — Always complete measurements first, including ceiling height and door widths, and compare them against the assembled dimensions listed in product specs (not the shipping box dimensions).
- Overspending on accessories and machines while cheaping out on the bench and bar. — Allocate budget in this order: floor protection, bench, barbell and plates, rack, then accessories. A quality bench and bar last decades; gadgets do not.
- Choosing a bench or rack with a weight rating too close to current body weight and lifting weight. — Buy ratings with room to grow: a 600+ lb bench rating and a rack rated far above your heaviest planned lift. Weight on the rating includes your body weight on the bench.
- Assembling equipment on bare floor without mats, damaging flooring and amplifying noise. — Install rubber or high-density foam flooring before placing any equipment, and order mats in the same purchase as the heavy items.
Troubleshooting
Problem: Rack or bench wobbles after assembly.
Solution: Place a spirit level on the frame. If the floor is uneven rather than the assembly being faulty, use the adjustable feet (most racks have them) or rubber shims under the short leg. Re-tighten all hardware after leveling.
Problem: Missing bolts or damaged parts in the delivery.
Solution: Contact the retailer’s parts department the same day with your order number, the part numbers from the manual, and photographs. Most manufacturers ship replacement hardware free within the warranty period; do not substitute hardware from a hardware store unless the specifications match exactly.
Problem: Ceiling is too low for overhead pressing.
Solution: Press seated on the adjustable bench, switch to neutral-grip pressing with shorter dumbbells, or perform standing presses outside under a covered area. When buying a rack, choose a short model (under 80 inches) if your ceiling is under 8 ft.
Problem: Equipment arrived but will not fit through the door or hallway.
Solution: Do not force it. Disassemble the item into its major sub-assemblies outside or in the garage, then carry components in individually and reassemble in the room. Keep the assembly manual and note the order of disassembly.
What Success Looks Like
Your home gym set is complete when all of the following are true: every item on your planned list is assembled, level, and stable; floor protection covers the training zone; all hardware has been tightened twice; safety bars on the rack are set and tested with light loads; you have performed one full light-weight session of your main lifts without any equipment shifting; and every piece of equipment has a fixed storage location with clear walkways. If you can complete a full workout start to finish without moving furniture or hunting for a missing piece, the setup is done.
Next Steps
Run your first two weeks of training with moderate weights while you confirm the equipment suits your routine. Re-tighten all rack and bench hardware after the first week of use — bolts settle under repeated load. Keep your purchase receipts and warranty documents in a single folder; most bars and racks carry multi-year or lifetime warranties worth using. As your lifting improves, expand the set in this order: more plates, a dipping attachment for the rack, adjustable dumbbells, then conditioning equipment like a rower or bike. Reassess your setup every six months and add only what your actual training has proven you need.
Frequently Asked Questions
How much space do I need for a basic home gym set?
A dumbbell-based starter set fits in about 6 ft x 6 ft of clear floor space. A full barbell-and-rack setup needs roughly 8 ft x 8 ft with at least 7 ft of ceiling height, though 8 ft is safer for overhead movements.
Is it cheaper to buy a bundled home gym set or individual pieces?
Bundles can save 10-20% but often include low-quality benches or filler accessories. Buying individually lets you put money into the items that matter most — the bench, bar, and rack — and skip what you do not need. Compare the bundle’s per-item ratings against standalone products before deciding.
What is the minimum equipment needed to build muscle at home?
Adjustable dumbbells, an adjustable bench, and a pull-up bar cover every major muscle group. Add a barbell, plates, and rack when your strength outgrows dumbbells, typically once you can press or row the heaviest dumbbell setting for strict sets of 10.
Can I put a home gym in an upstairs room or apartment?
Yes, with limits. Use thick rubber mats to protect flooring and reduce noise, avoid dropping weights, and confirm the floor can handle the combined weight of equipment plus your body. A dumbbell setup is far more apartment-friendly than a loaded barbell and rack. Check your lease or building rules first.
How do I maintain the equipment once it is set up?
Wipe the barbell with a lightly oiled cloth monthly to prevent rust, brush the sleeve grooves clean, re-tighten rack and bench hardware every few months, and keep the bench upholstery dry and out of direct sunlight. Store plates on pegs or a tree rather than stacked on the floor.
Fall Picks
fall essentials
As an affiliate, we earn on qualifying purchases.